
I hope your week has started well and that you all had a great weekend!
J and I went up to visit my parents this past weekend and celebrate J's Birthday. We took Friday off and spent the morning just bumming around the house before we got up and went to lunch and then my mom and I went to the hotel that I was considering for my cousin's shower in late June.
I absolutely loved the room at the hotel and went ahead and signed the agreement while I was there... we have a place and a time... now I just have to finish up the invitations and get them out!
On Friday night, we went to a Tin Caps (minor league) baseball game with some friends and family and it was a great night to be at the ballpark! So great that I forgot to take picture :(
J got up early the next day to go run a race and then we all went to watch my cousin play baseball. He's a sophomore and some of my favorite summer memories have come from evenings watching him play baseball... I can't believe how old he's getting!!!
So after the baseball game, my mom and I went shopping... New York & Co. was having a 50% off sale and we don't have one here in Bloomington, so I had to take advantage. Then we went to dinner to celebrate J's Birthday/Mother's Day with my Aunt and Uncle. J picked the restaurant because it's got the best cheesecake ever :-D
Sunday was another day to just be around the house. My mom had a whole bunch of flowers left at her house from my wedding (we used silk) and I told her a while back that we were going to make wreaths with them, so we finally did! I was inspired by the lastingwreaths shop on Etsy...
 |
| via |
Here's what you need
- A grapevine wreath
- Silk flowers - I used two different colors/kinds hydrangeas
- A wooden letter (first letter of your last name, probably) painted to compliment the flowers
- Skinny floral wire (any color)
- Thicker floral wire that looks like grapevine
- Hot glue gun with glue sticks
- Wire cutters
Get with your wreath

Your flowers, which I actually just pulled off the stems, but that you should cut to leave about 1"-1.5" of stem below the flower you do not have the option to pull them off the top.

And your letter, already painted.

Start by setting your "anchoring" flowers... the ones that mark the top and bottom of your flower sections. From there, I also marked my center flower so that I knew how I would divide my other flowers.

As you are putting the flowers in, really push them in to the wreath... the wreath and the flowers are pretty tough so it should not mess anything up. You'll also want to set the location of your letter at this time.

Once you have the anchoring flowers in place, you can fill in with your other flowers

Once you have your wreath how you want it, you can start attaching. I started with my letter...
I crisscrossed the skinny floral wire around the letter and the wreath and attached it at the back.


Because I only had green floral ribbon, I also painted it to match my letter.

Then I moved on to my flowers. I got going with my glue gun and completely forgot to take pictures of the glue on the flowers, but basically you want to put a pretty good amount of glue right about where the red arrow is. If you have flowers that go all the way through to the back of the wreath (where you can see them when the wreath is flipped over) you can also fill in some glue on the back to both hold the flower in, and to protect your door from being scratched by the wire/stem of the flower.
.jpg)
Once I had all of my flowers attached, I made a loop that I could hang it from and attached

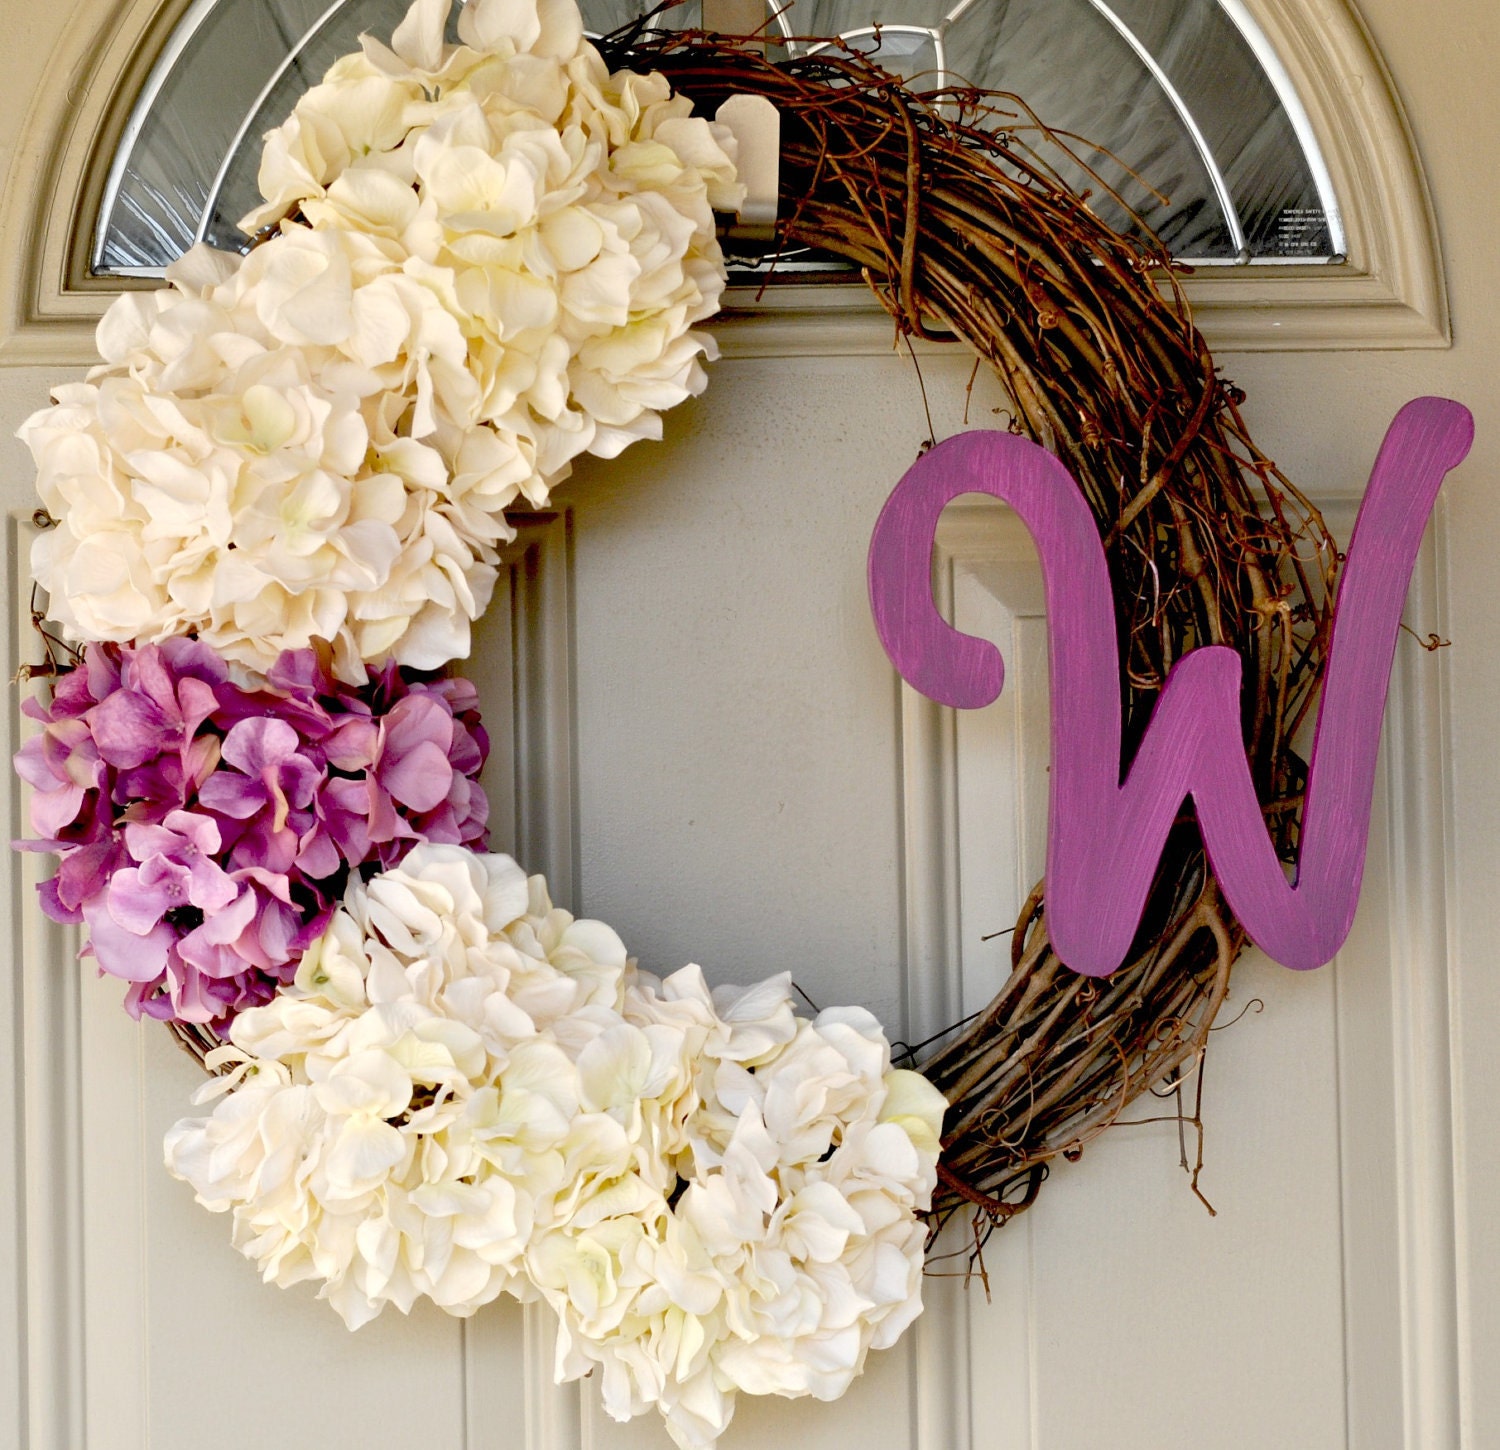
Here's the finished product!!

I love how the flowers pop on the door... I'm excited to leave this one up throughout the summer!
Have a great week... I'll be at a conference up in Michigan for the next few days.
Wedding Wednesday tomorrow!
No comments:
Post a Comment